8-Node Raspberry Pi 3 Cluster
How to build an 8-node raspberry pi 3 cluster for parallel processing using openmp
How to Make a Raspberry Pi 3 Cluster 🚀

Content
- Parts List
- How to Setup the 1st Pi (aka “The Master Node”)
- How to Setup SSH & SCP
- How to Install MPI
Parts List
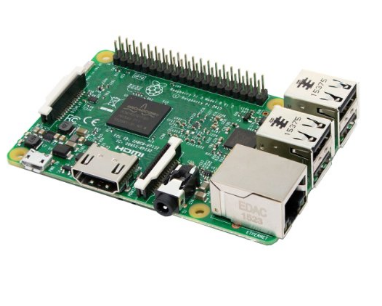
For this demo, we will be setting up a Raspberry Pi 3 cluster with 8 Raspberry Pi’s (nodes). The cluster will consist of one “master” node and seven “slave” nodes. The master node will serve as a DHCP server to the slave nodes. (This means the master node will assign IP addresses to the slave nodes and handle all network coordination for the cluster) Once our cluster is complete, we will communicate with the slave nodes through the master node.
In order to make our final product more presentable and less of a wire mess, we opted for a 10-port USB wall charger that all of our Pi’s could plug into, along with an optional USB power cord for our ethernet switch too. This reduced the number of electrical outlets required to power the cluster, and makes for easier transport.
Our Shopping List:


NOTE: You do not need the switch if you plan on connecting all of your cluster Pi’s into an existing router/switch and have enough ports to do so.
How to Setup the 1st Pi (aka “The Master Node”)
How to Install the OS (Operating System)
We used the official Operating System “Raspbian Jessie with Desktop”. Go to the Rapsberry Pi’s official site, navigate to the “Downloads” section and click “Download ZIP” for the aforementioned operating system. (https://www.raspberrypi.org/downloads/raspbian/)
Flash Image to MicroSD
Use Win32DiskImager or Etcher to install your preferred image to the microsd card
More details here: https://www.raspberrypi.org/documentation/installation/installing-images/README.md
Configure Your Pi’s Settings
sudo raspi-config
- Internationalisation –> Change Locale / Timezone / Keyboard / Wifi Country to US options.
- Advanced Options –> Change Memory Split to 16 && Activate SSH
- (since we’re not using the GUI much, we’d prefer more of the shared memory for computing)
Network Setup
The easiest way is to directly plug in to a router to get fastest internet during setup. Alternatively, connect via wifi through the wifi tray icon.
Update our Pi
sudo apt-get update
sudo apt-get upgrade
# then install any apps you'd like on all raspberrypi's ....
sudo apt-get install mpich openjdk-8-jdk vim tmux htop ranger
Clone MicroSD
The easiest way is on Windows.
- Install Win32DiskImager and insert the updated Raspberry Pi’s MicroSD card into your Windows box.
- Make up an image name and select a directory to save it to
- Click “Read”
This will create an image of the MicroSD.
Once it’s finished…
- Eject the MicroSD and insert a new one to clone the image to.
- Select the image file we just created, choose the MicroSD drive from the dropdown and click “Write”
…Repeat for remaining Pi’s…
Completing Setup of Master Node Raspberry Pi
Install DHCP server software for master node
sudo raspi-config
- Advanced Options –> Host Name –>
rpi3-node0
Install DHCP server software so master node can assign IP addresses and coordinate network traffic & jobs.
sudo apt-get install isc-dhcp-server
Configure DHCP
sudo nano /etc/dhcp/dhcpd.conf
- PUT comment tag
#in front ofoption domain-name "example.org"; - PUT comment tag
#in front ofoption domain-name-servers ns1.example.org, ns2.example.org; - REMOVE the comment tag
#in the line#authoritative;
Then go to very bottom and add the following subnet block:
(we’ll be using a subnet of 192.168.8.0 but you can use a different one.)
subnet 192.168.8.0 netmask 255.255.255.0 {
    range 192.168.8.100 192.168.8.200;
    option broadcast-address 192.168.8.255;
    option routers 192.168.8.1;
    max-lease-time 7200;
    option domain-name "rpi3";
    option domain-name-servers 8.8.8.8, 8.8.4.4;
}
- Save & Exit.
Adjust Server Configuration
sudo nano /etc/default/isc-dhcp-server
Add eth0 to interfaces line at bottom INTERFACES="eth0"
- Save & Exit.
Adjust Interface File
This is to get our master node to serve as DHCP & NAT server for cluster.
sudo nano /etc/network/interfaces
- ADD the line
auto eth0right above the lineiface eth0 inet manual - CHANGE
iface eth0 inet manualtoiface eth0 inet static
Now we’ll assign a static IP address for the master node
- ADD the line
address 192.168.8.1directly below the line we just modifiediface eth0 inet static - ADD the line
netmask 255.255.255.0directly below the line we just addedaddress 192.168.8.1
Our final file should look something like this:
...
auto lo
iface lo inet loopback

auto eth0
iface eth0 inet static
        address 192.168.8.1
        netmask 255.255.255.0

allow-hotplug wlan0
auto wlan0
iface wlan0 inet dhcp
        wireless-power off
...
All DHCP settings are completed
- RESTART Pi
NAT Configuration
Now we’ll configure IP tables to provide network address translation services to our master node
sudo nano /etc/sysctl.conf
- REMOVE comment tag
#on the line#net.ipv4.ip_forward=1
Make sure in the line above it is set equal to 1, which it should be by default.
- SAVE & EXIT
sudo sh -c "echo 1 > /proc/sys/net/ipv4/ip_forward"
sudo iptables -t nat -A POSTROUTING -o wlan0 -j MASQUERADE
sudo iptables -A FORWARD -i wlan0 -o eth0 -m state --state RELATED
sudo iptables -A FORWARD -i eth0 -o wlan0 -j ACCEPT
Now we’ll check everything is correct by running: sudo iptables -t nat -S
Which should output:
-P PREROUTING ACCEPT
-P INPUT ACCEPT
-P OUTPUT ACCEPT
-P POSTROUTING ACCEPT
-A POSTROUTING -o wlan0 -j MASQUERADE
One more command to verify everything is correct: sudo iptables -S
Which should output:
-P INPUT ACCEPT
-P FORWARD ACCEPT
-P OUTPUT ACCEPT
-A FORWARD -i wlan0 -o eth0 -m state --state RELATED
-A FORWARD -i eth0 -o wlan0 -j ACCEPT
To save these settings:
sudo sh -c "iptables-save > /etc/iptables.ipv4.nat"
To make sure this is used every time interface comes up:
sudo nano /etc/network/interfaces
- ADD
post-up iptables-restore < /etc/iptables.ipv4.natunder our previously added linenetmask 255.255.255.0in theeth0section. - SAVE & EXIT
Now, every time eth0 successfully comes up, it will run the iptables restore command to reset the routes and NAT we need.
Check our Config on Master Node
ifconfig should show the IP address we assigned it inet addr:192.168.8.1 under the eth0 section.
Verify DHCP Lease
Power on one of the cloned slave node raspberry pi’s we created earlier and make sure it’s connected to the same switch as the master node. This slave node should have automatically received an IP address from the master node’s DHCP server we just setup. To verify this happened, run this command on the master node
cat /var/lib/dhcp/dhcpd.leases
You should see one or more entry blocks for a lease on a new IP address.
Example Output:
lease 192.168.8.103 {
    starts 3 2017/06/10 05:11:28;
    ...
    hardware ethernet bc:4f:f5:8c:14:d9
    ...
    client-hostname "rpi3-node1";
}
- COPY the MAC address (hardware ethernet address) listed in your output
Assign static IP’s for slave nodes
On the master node still, run:
sudo nano /etc/dhcp/dhcpd.conf
At the very bottom of the file add :
host rpi3-node1 {
hardware ethernet bc:4f:f5:8c:14:d9;
fixed-address 192.168.8.101;
}
- SAVE & EXIT
- REBOOT the slave node we just powered on. We should now be able to SSH in to the slave node at the IP address we just assigned it.
Test SSH on Slave Node
On the master node, run:
ssh pi@ip-address-assigned
If we login, then we’ve succeeded so far. Now we should make sure our Slave node’s host name is updated. In the SSH session, run:
sudo raspi-config
- Advanced Options –> Hostname –>
rpi3-node1 - SAVE & EXIT
- EXIT SSH Session
Repeat the Last 3 Sections for Each Slave Node before Continuing
Raspberry Pi Cluster SSH & SCP Setup
Automated/Passwordless SSH Setup
Verify Hostnames
The hostnames used for our cluster are:
- rpi3-node0
- rpi3-node1
- …
- rpi3-node7
You can verify that your current Pi has an appropriate hostname by running cat /etc/hostname and see if you get one of the node hostnames listed above.
Generate Master Node SSH Key
To make things easier for connecting to our slave nodes from the master, we will generate a SSH key for the master node and then register it as an authorized SSH key on each of the slave nodes. You generate an SSH key on the master node by running:
ssh-keygen –t rsa –C “pi@master-node0”
The -C in the above command is just to add our own comment to the SSH key.
You will be prompted for a file to save the key, just leave it blank by pressing enter. You will be prompted for a passphrase, again, just leave it blank by pressing enter twice. (We’re leaving it blank to avoid having to type passwords when running parallel programs in our cluster)
Once the master node SSH key is generated, we need add it to the other slave nodes as an authorized key.
cat ~/.ssh/id_rsa.pub | ssh pi@ipaddressofslave “mkdir .ssh;cat >> .ssh/authorized_keys”
The above step can be repeated for all the slave nodes by replacing the IP address and user (if username differs, in our case all users are the default “pi”).
Alternatively, if you have many nodes to copy this to, you can automate this process with a bash script and a txt file listing all the IP addresses of the nodes you wish to copy this to.
while read ip; do
 ssh-copy-id -i ~/.ssh/id_rsa.pub pi@$ip
done < IPlistfile.txt
Once done, ssh each of the slave node and create the ssh key using the same command as in master node. Once ssh key was generated, the public key of each node needs to be added to the authorized key of Master node using the same command as in master node.
cat ~/.ssh/id_rsa.pub | ssh pi@ipaddressofmaster “cat >> .ssh/authorized_keys”
Automated/Passwordless SCP Setup
Once the passwordless SSH is setup, we can easily copy files to all nodes with scp. SCP is used to send files back and forth between networked nodes through the terminal.
A common use would be something like:
scp /path/to/fileToBeSent.cpp pi@slave-ip-address:~/slave/code/path
We can automate this a bit with some bash scripting:
while read ip; do
  scp /home/pi/fileToBeSent.cpp pi@$ip:~/slave/code/path
done < IPlistfile.txt
There are several ways to achieve this, another good option if available on your setup may be the package
parallel-scp : http://manpages.ubuntu.com/manpages/trusty/man1/parallel-scp.1.html
MPI Installation
Install MPICH
sudo apt-get install mpich
Install mpi4py
Go to home directory.
cd ~
Download mpi4py tarball:
wget https://bitbucket.org/mpi4py/mpi4py/downloads/mpi4py-2.0.0.tar.gz
Update:
sudo apt-get update --fix-missing
Unzip the file:
tar zxf mpi4py-2.0.0.tar.gz
Navigate to the directory:
cd mpi4py-2.0.0
Installation for Python 3
sudo apt-get install python3-dev
sudo python3 setup.py build --mpicc=/usr/bin/mpicc
sudo python3 setup.py install
Installation for Python 2
sudo apt-get install python-dev
sudo python setup.py build --mpicc=/usr/bin/mpicc
sudo python setup.py install
MPICH & OpenMP Instructions
MPICH
Make a directory for yourself on all nodes (if you dont have one already) First make one on the master node:
mkdir ~/mpich/{YOUR_NAME}
After you’ve done that, send the command to the rest of the nodes:
parallel-ssh -i -h ~/pssh_hosts mkdir ~/mpich/{YOUR_NAME}
Copy the code from your flash drive to your folder on the master node:
cp /media/pi/{YOUR_FLASH_DRIVE}/{YOUR_CODE.CPP} ~/mpich/{YOUR_NAME}/
Compile your code w/ mpicc:
mpicc -o {EXEC_NAME} {SOURCE.CPP}
Copy your executable to all the slave nodes:
parallel-scp -v -h ~/pssh_hosts ~/mpich/{YOUR_NAME}/{YOUR_EXEC} ~/mpich/{YOUR_NAME}/
Run your executable on the master node w/ mpirun or mpiexec:
mpirun -n 8 -hostfile ~/host_file ~/mpich/{YOUR_NAME}/{YOUR_EXEC}
OpenMP
mpicc -fopenmp -lstdc++ -o hello_world hello_world.cpp
run w/ mpirun
References: